Mobile Development | Product Engineering | Software Development
A Quick and Easy Guide to Develop Your First Mobile App Sujay Midde 11 Sep, 2015


In this blog we will share how to use Keycloak for Identity and Access Management. but first here are some Frequently asked questions about Keycloak.
What is Keycloak?
Keycloak is an open source Identity and Access Management tool with features such as Single-Sign-On (SSO), Identity Brokering and Social Login, User Federation, Client Adapters, an Admin Console, and an Account Management Console.
Is Keycloak free?
Yes Keycloak is free, As Keycloak is open-source and has Apache License 2.0.
IAM or IdM(Identity Management) is a framework used to authenticate the user identity and privileges. It checks whether the users have access to necessary files, networks and other resources that the user has requested. It also checks how and by whom the information can be accessed and modified by the management of descriptive information of users. IAM systems provide tools and some technologies to the administrators to change a user’s role, keeping track on user activities etc.
https://www.youtube.com/watch?v=GHy2KFjlhpg
Identity Management has four main basic functions:
Single sign-on (SSO) is a property of access control for multiple related and independent software systems where user login with single ID and password to gain access to a connected system/s without different usernames or passwords. SSO is typically accomplished on Lightweight Directory Access Protocol(LDAP) and stored LDAP databases on (directory) servers, an SSO can be achieved over IP networks using cookies but only if the sites share a common DNS parent domain. Shared authentication schemes include OAuth, OpenID, OpenID Connect and Facebook Connect. All the authentication schemes which we are using need user to log in their credentials every time they access a site or application, but we no need to get confused with SSO, in this single sign-on is enough to sign into different applications. By using SSO users can enter their credentials once but always when they are signed.
Keycloak is an open source identity and access management solution which mainly aims at applications and services. Users can authenticate with Keycloak rather than individual applications. So, the applications don’t have to deal with login forms, authenticating users and storing users. Once logged-in to Keycloak, users don’t have to login again to access different applications. Same thing is applicable to sign-out. Keycloak offers everything a sophisticated user management tool needs – without having to log on repeatedly with every login and into every system-as well as system security, social logins, support for mobile apps and integration into other solutions. Keycloak have implementations to LDAP and Active Directory as well.
Each new realm created has no password policies associated with it while users can create as short, as long, as complex, as insecure a password, as they want. Simple settings are fine for development or learning Keycloak, but unacceptable in production environments.
Keycloak has a number of policies you can set up for your FreeOTP or Google Authenticator One-Time Password generator. There are two types:
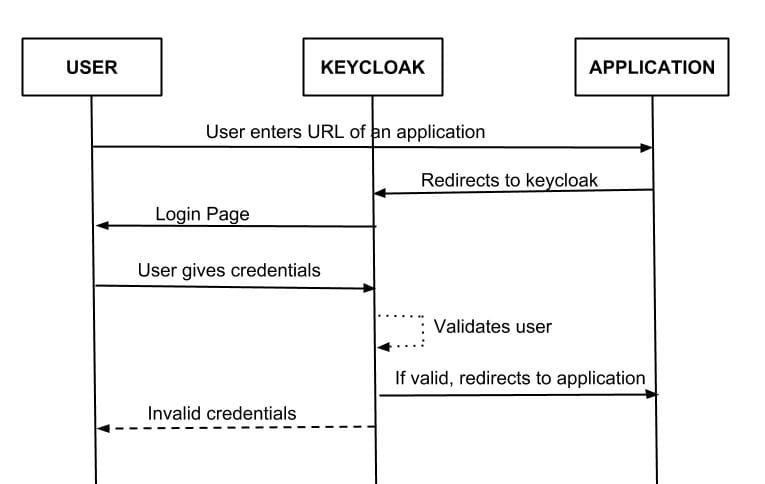
On a complete system secured with keycloak:
A user clicks from a public page to navigate to protected area within the application. The link to this protected area is in the application settings in keycloak admin console.
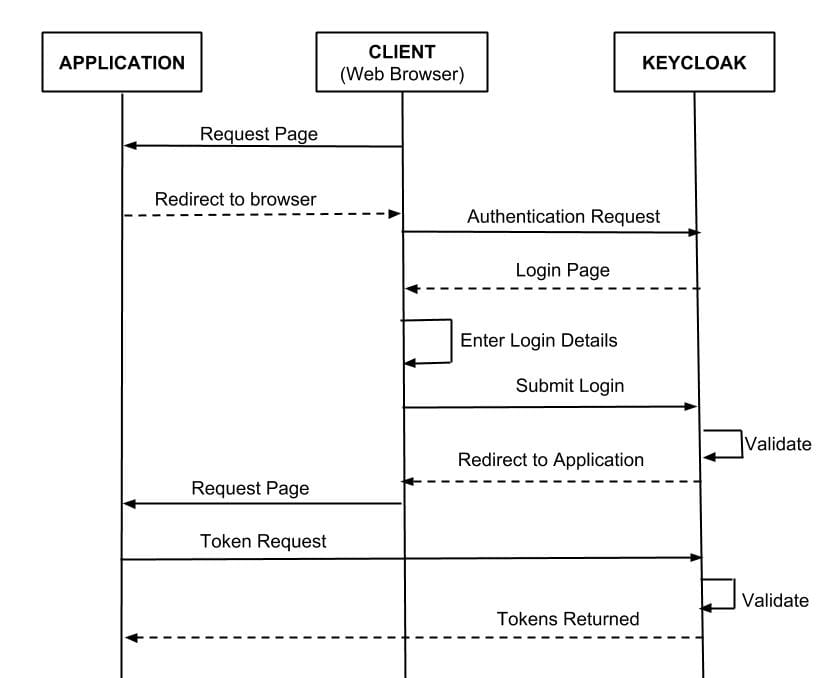
OIDC is an authentication protocol that is an extension of OAuth 2.0. OAuth 3.0 is only a framework for building authorisation protocols, but OIDC is a full-fledged authentication and authorisation protocol. OIDC authentication flow when integrated with keycloak:
The application extracts the temporary code and makes a background out of band REST invocation to keycloak to exchange the code for an identity, access and refresh token. Once this temporary code has been used to obtain the tokens, it can never be used again. This prevents potential replay attacks.
Requirements
The tools that we require are mentioned below:
Operating systems: Windows, Docker
Tools: Maven
Single-Sign-On: Keycloak
Development environments: Eclipse
Programming Language : Java
https://www.youtube.com/watch?v=sTaHHtSkF0A
Integrating multiple applications with keycloak
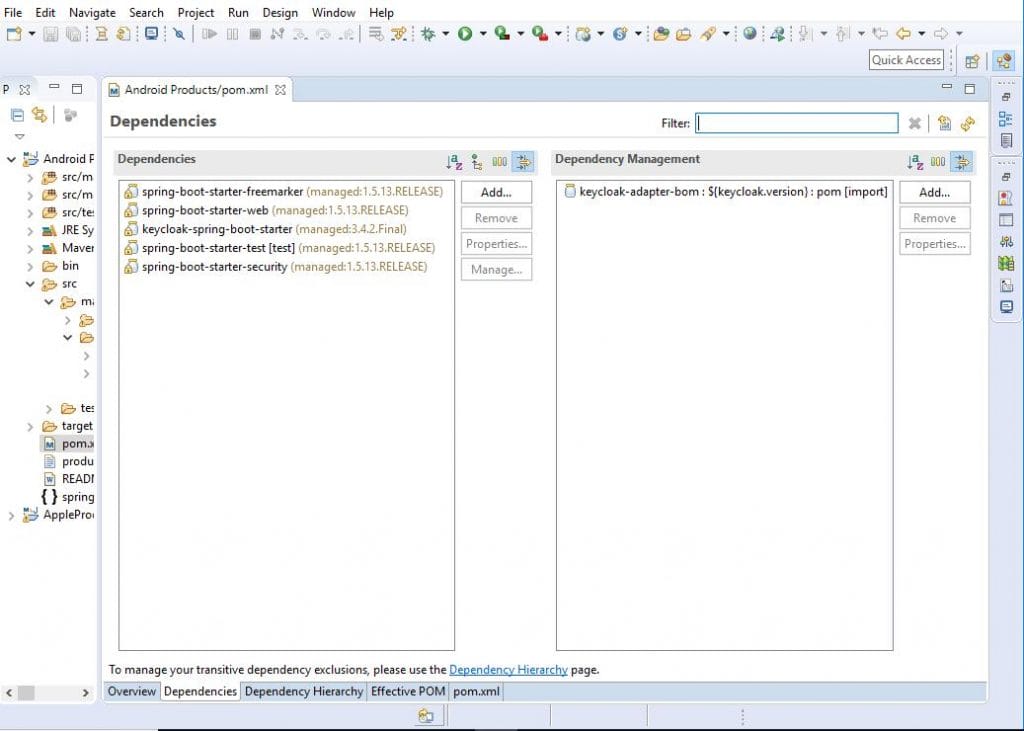
Add keycloak and spring-boot dependencies.
CreateSecurityConfig.java file to your project.
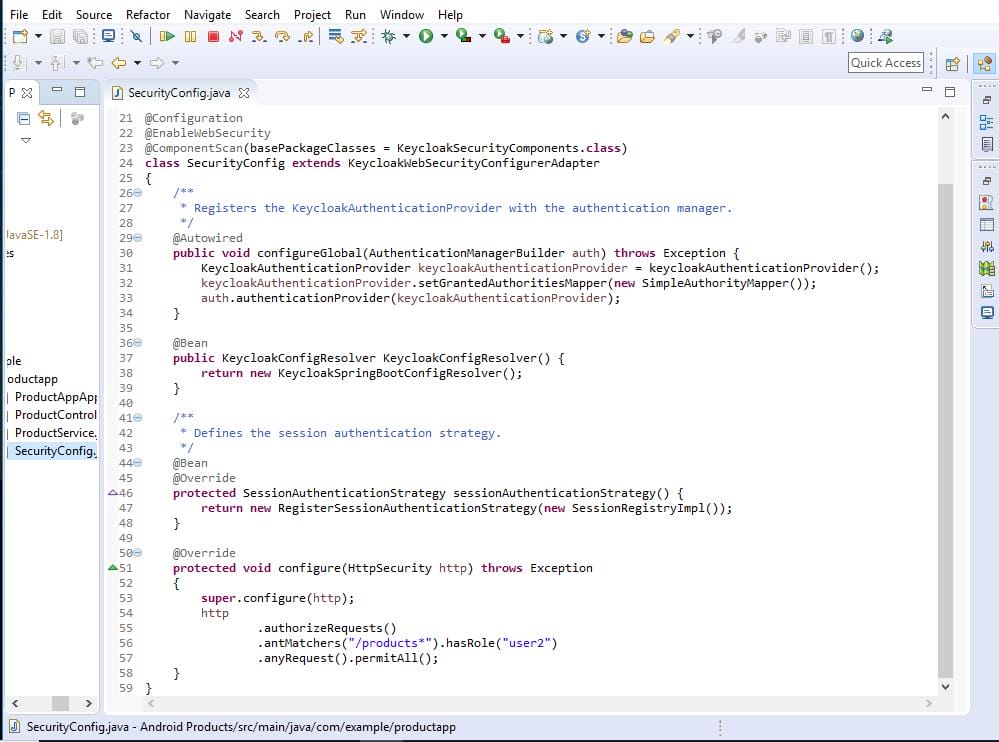
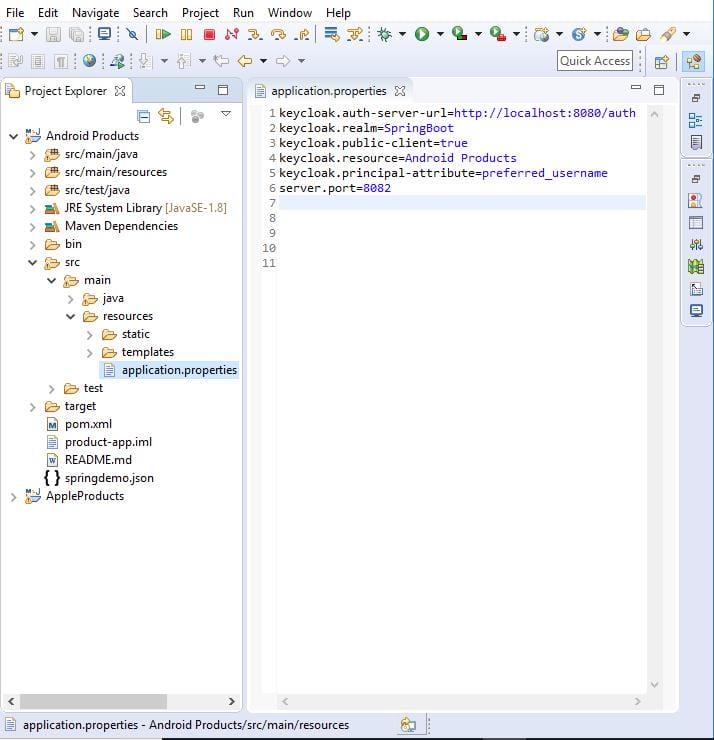
Create applications.properties file.
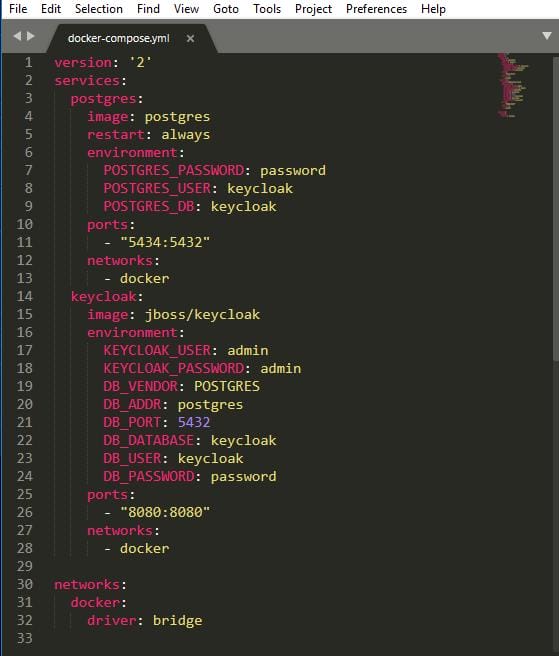
Open command prompt and run docker-compose up to run keycloak.

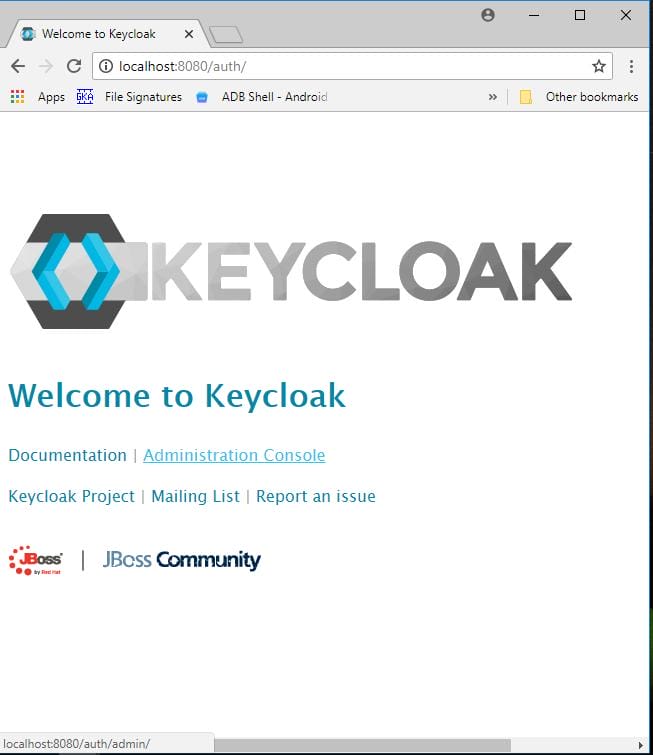
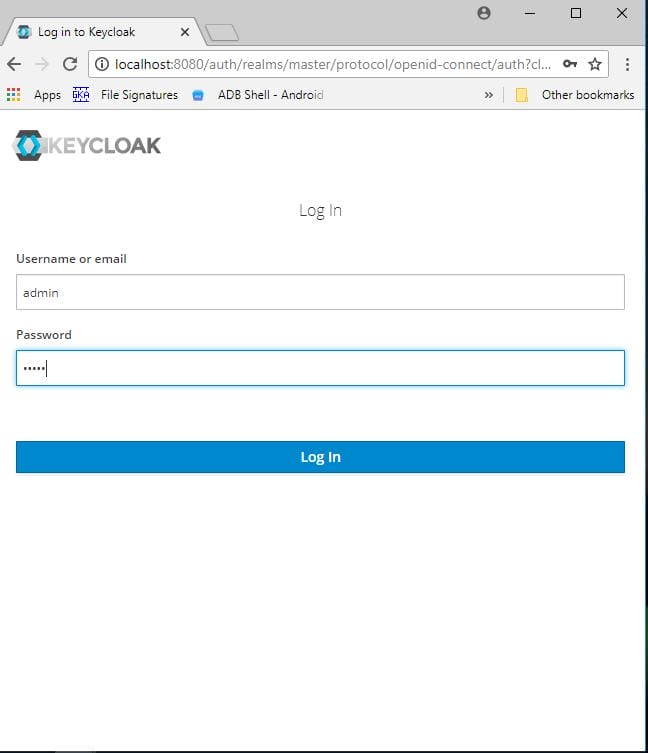
Open browser and enter the keycloak url. Click on Administration Console.
Default username and password is ‘admin’ , ‘admin’.
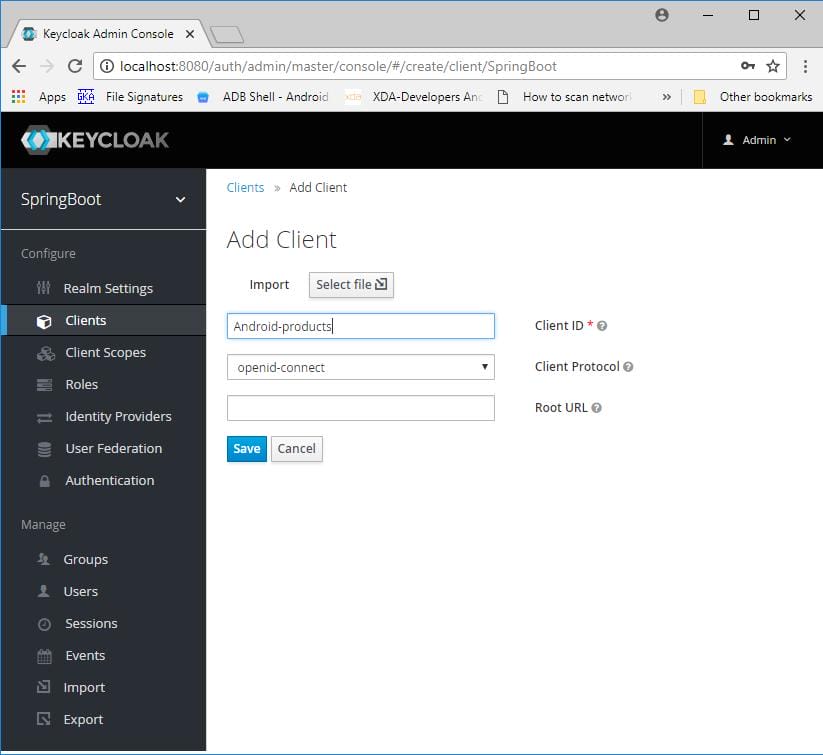
Click on Add Realm. Give a name to the realm.

Add a client.
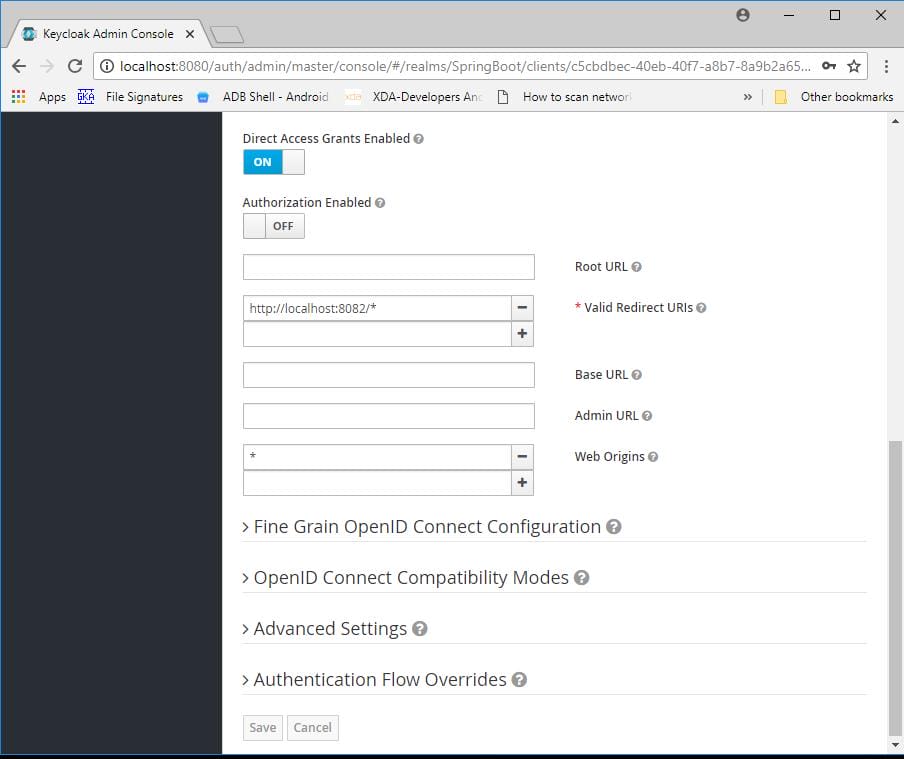
Give the URL path of your application in valid redirect URL .
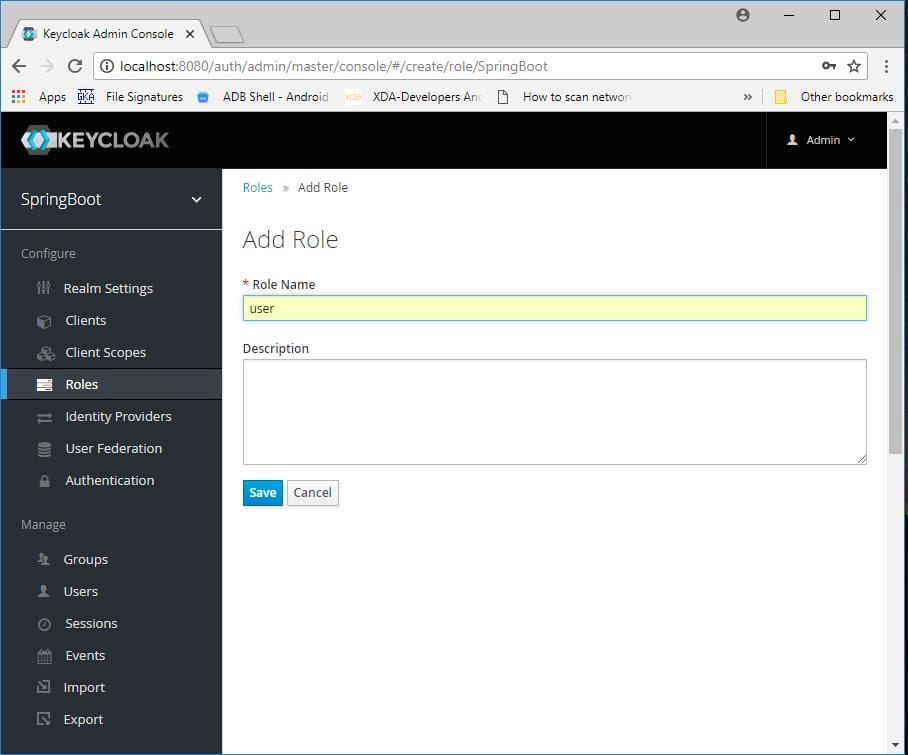
Add role.
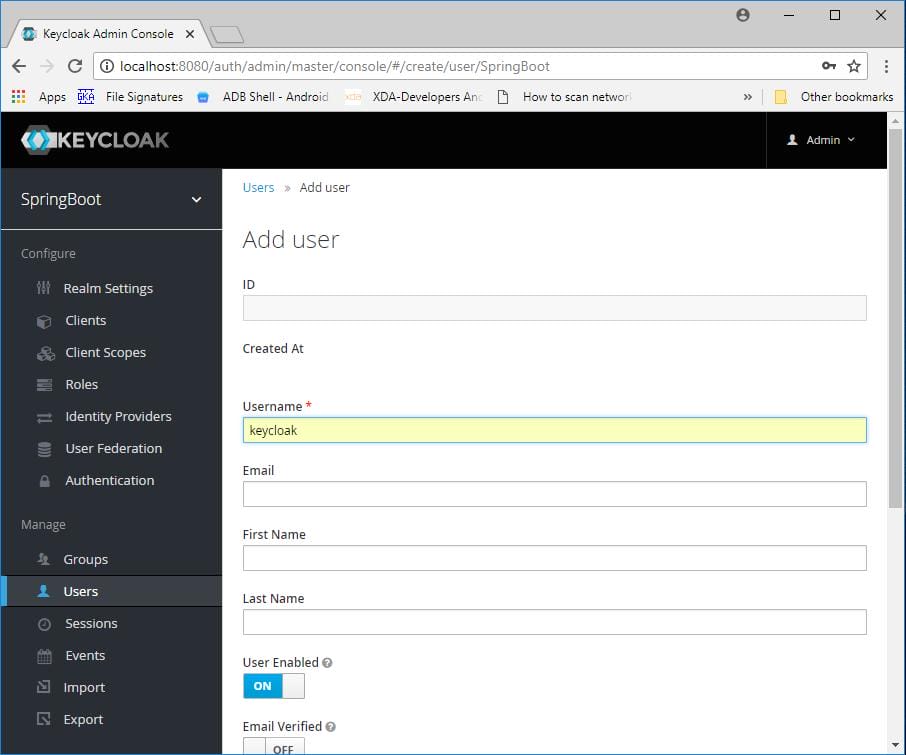
Add user.
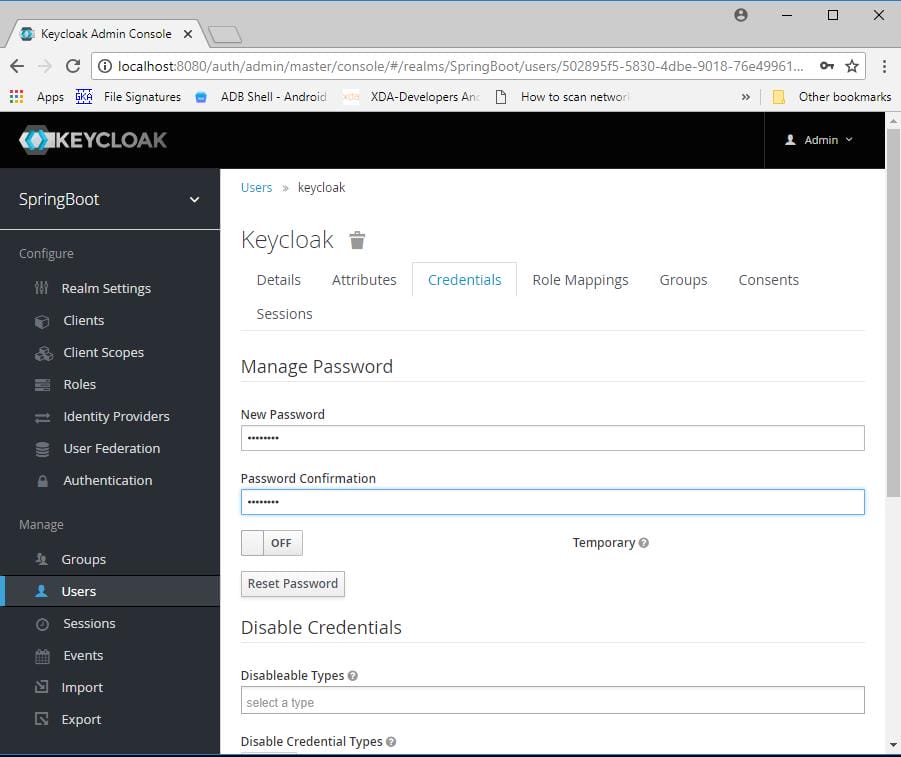
Go to credentials tab and reset password by giving new password.
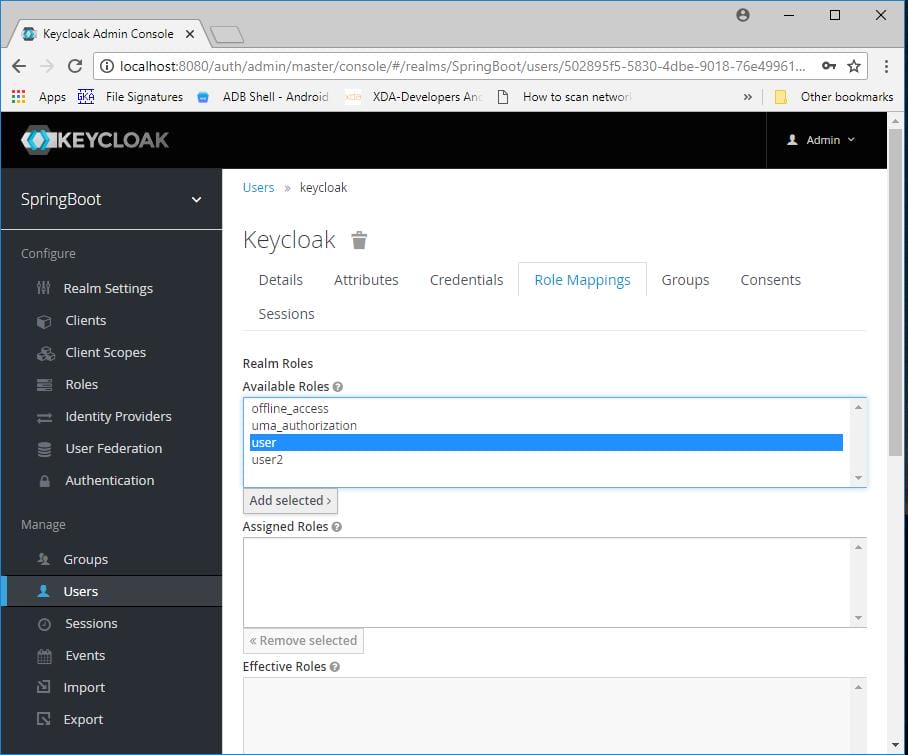
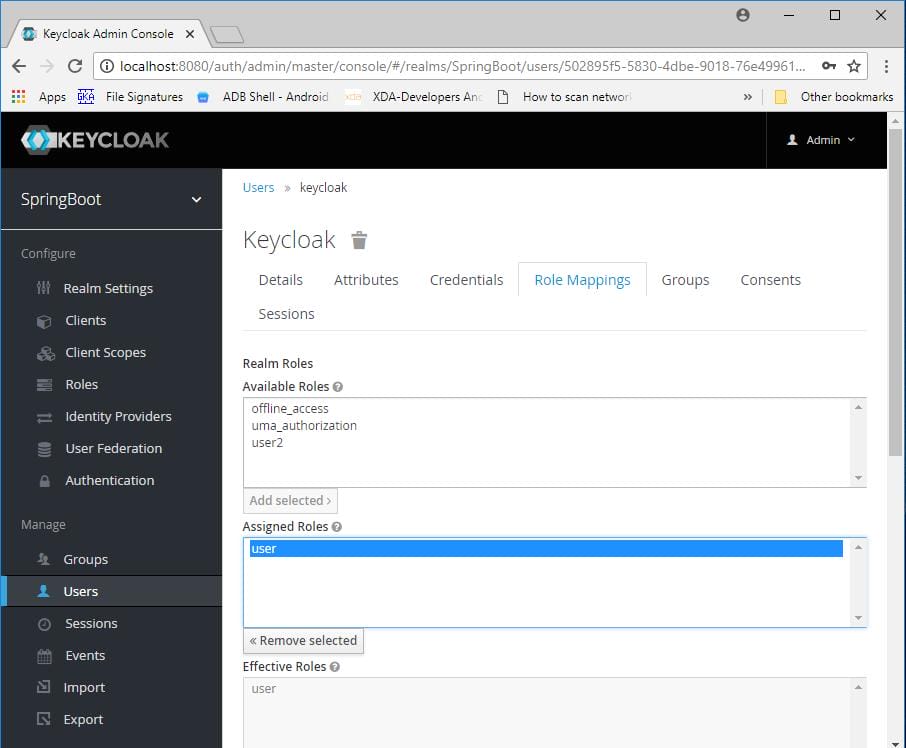
Go to role mappings tab and add a role to the user.
 Similarly create another application and add all the necessary files. In keycloak we will use the same realm but we need to add new client, role and user.
Now run two applications
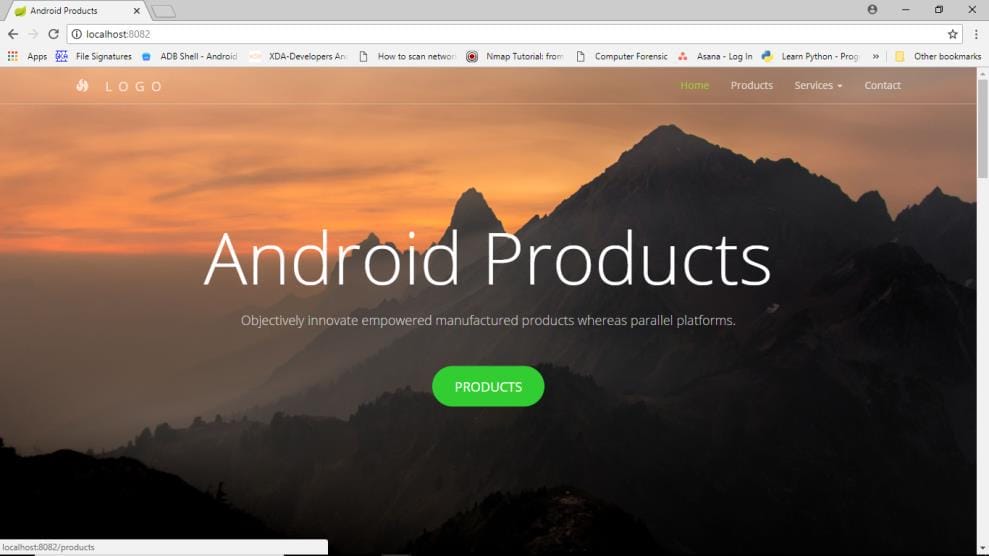
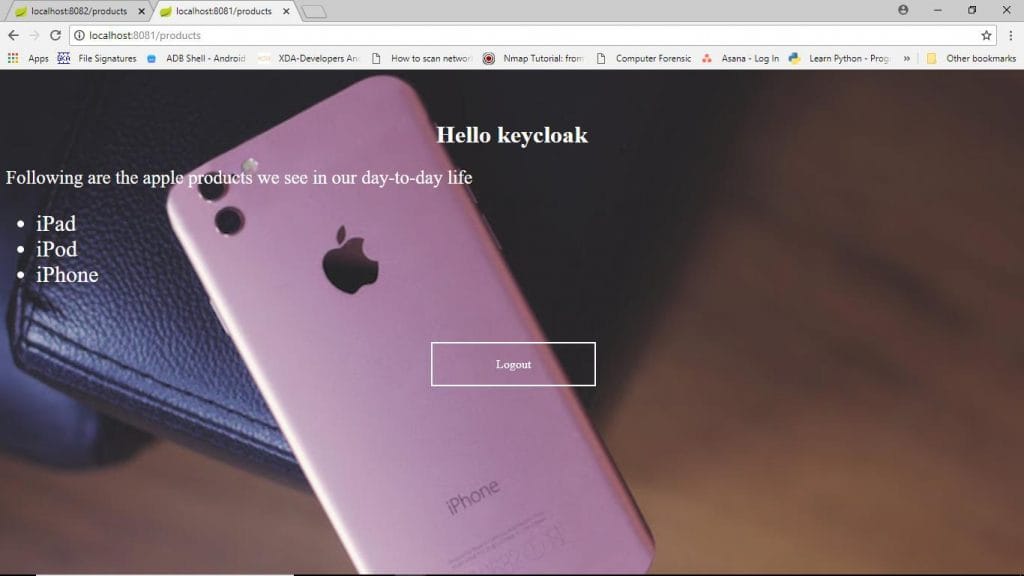
Open browser enter the url for first application.
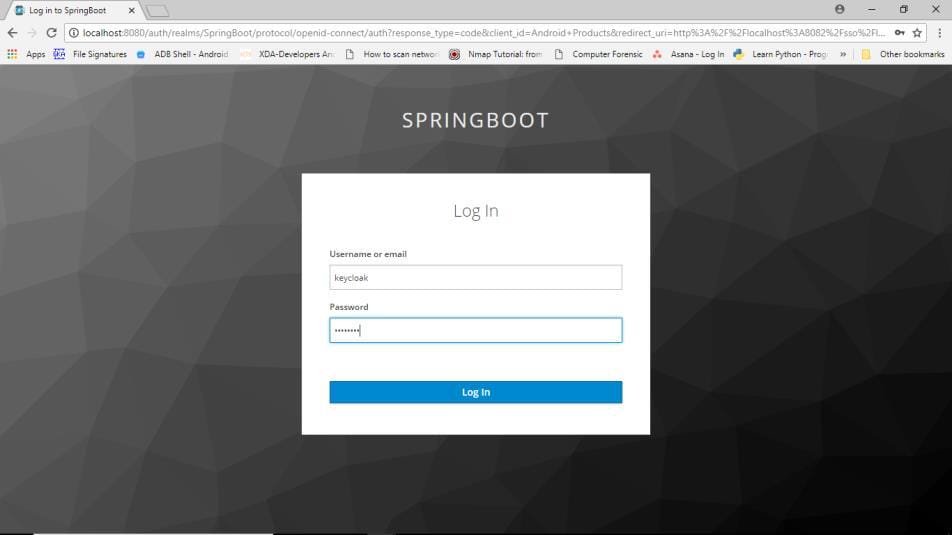
When I click on products button, it will redirect to keycloak. Give username and password.
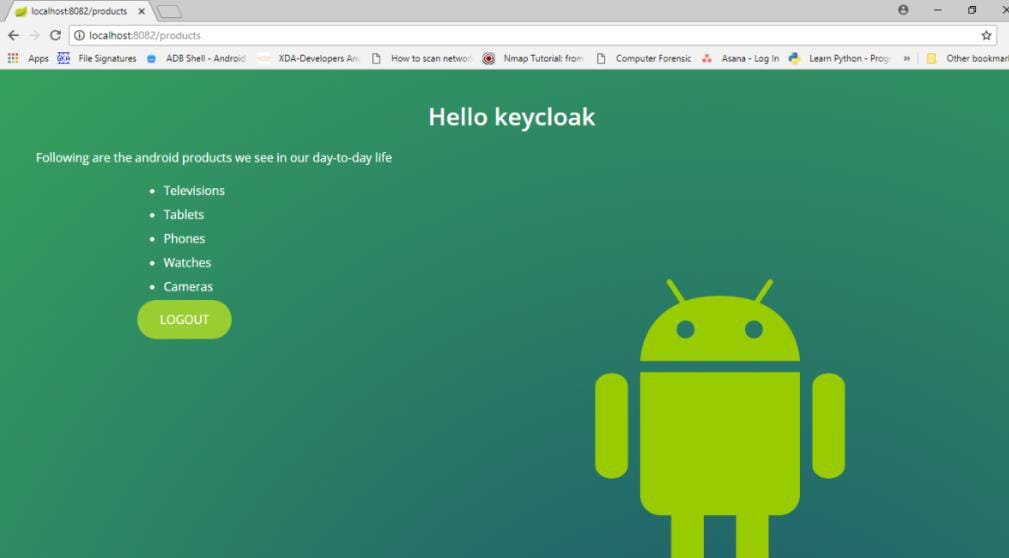
Now you will be redirected to the application.
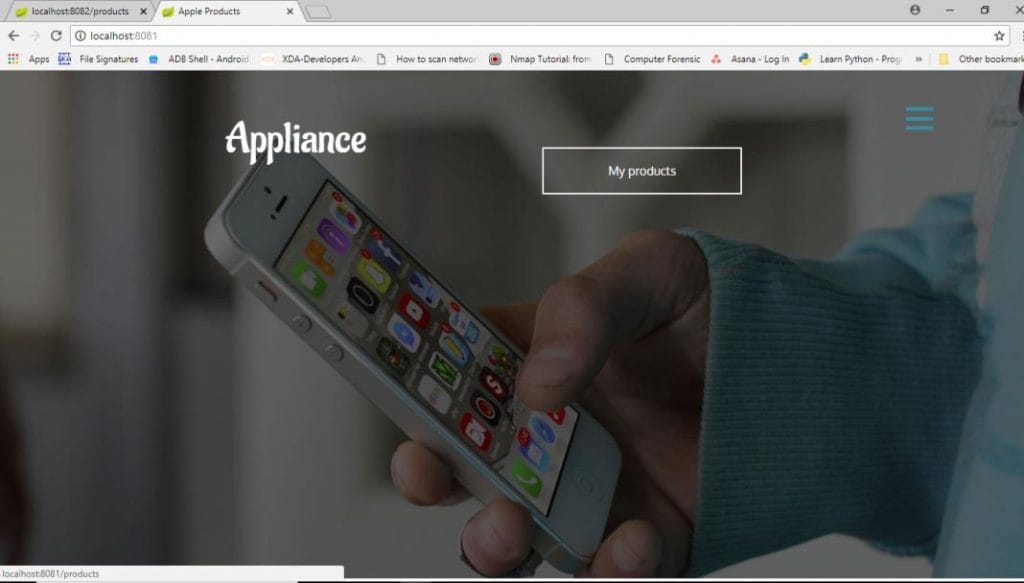
Now open another tab and give the URL for another application. You will be redirected to the application without going to the keycloak login screen.
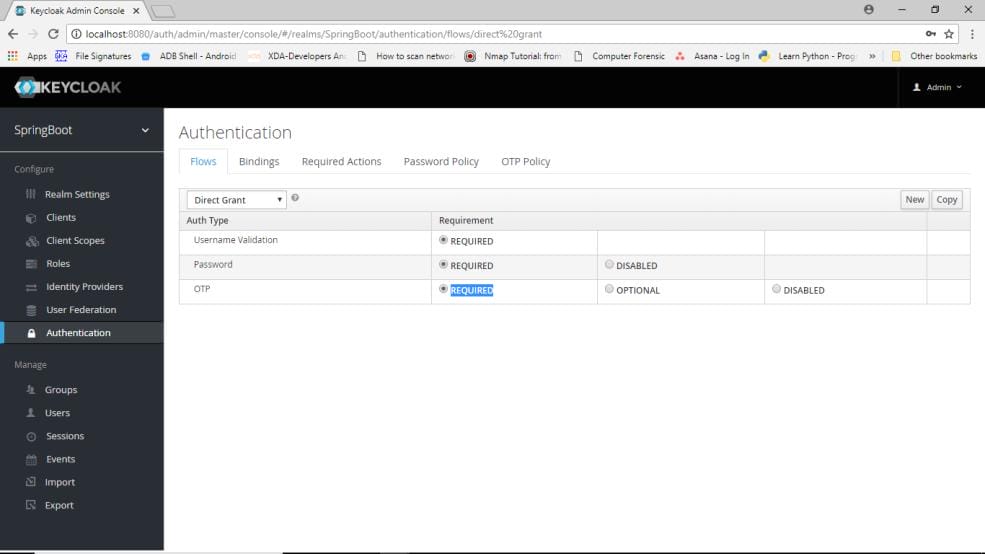
 We will add an authentication method i.e. OTP. Go to authentication-flows-direct grant, at OTP mark it to required.
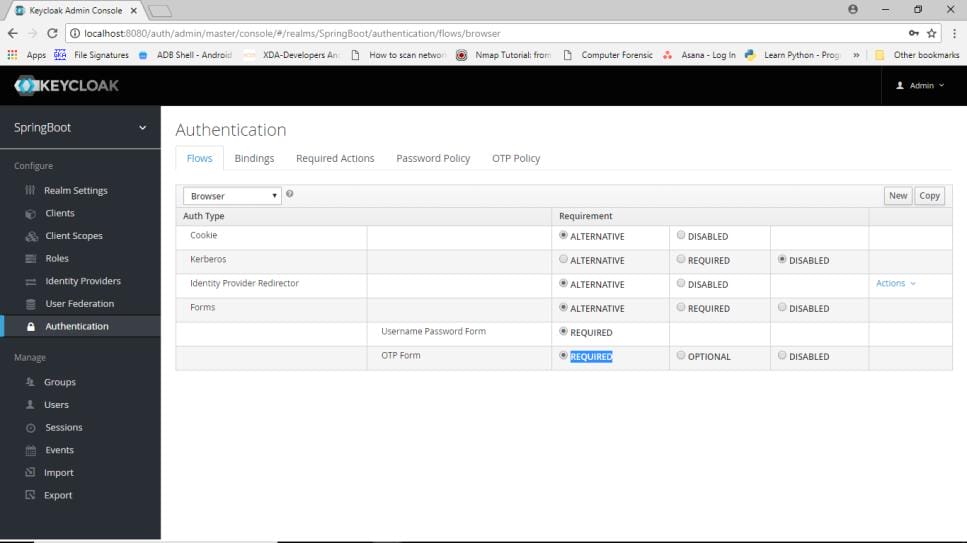
In browser flow mark OTP to required.
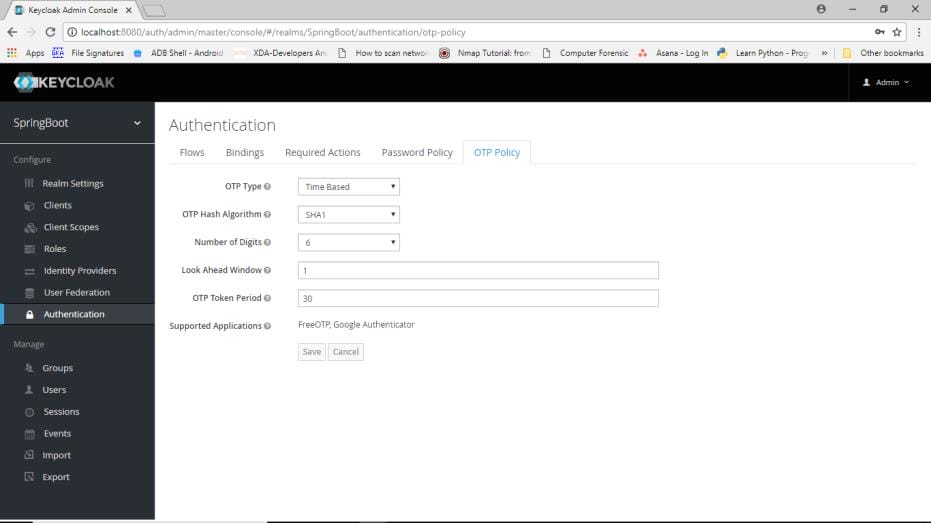
In OTP policy you can see the hash algorithms, time period etc.
You need to install FreeOTP application or Google Authenticator application on your mobile.
Now re-run keycloak, open browser and give a URL. After keycloak login page you will be redirected to this screen
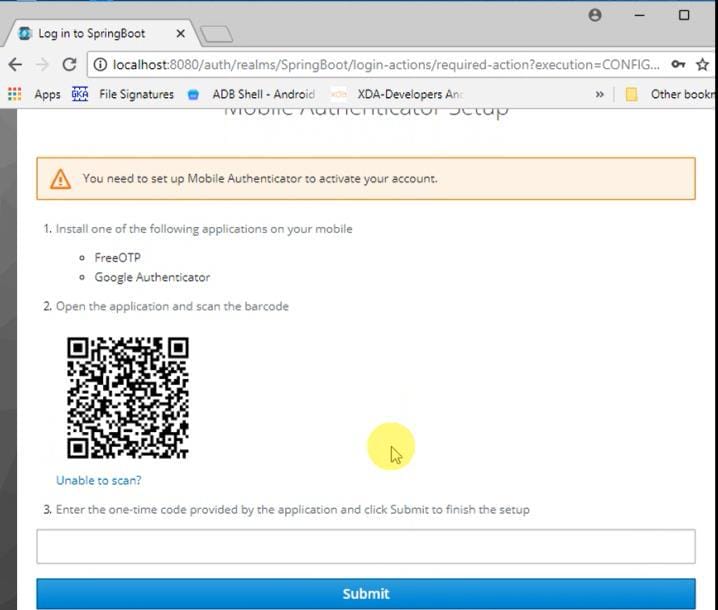
Now scan the barcode with the application that you have installed on your mobile and enter the OTP.
You will be redirected to your application.

